I promised some time ago to put up a tutorial for this book. We held the workshop a month ago and I have been putting it off because I knew I did not have a large enough window of time to get it all done in one sitting.
This project is an 8X8 comb bound book. The front and back are heavy chipboard covered with papers. The inside pages are cardstock and printed papers with folds, flaps, pockets and tags.
If you have the kit you will find that you have everything stacked to make creating the book easier. If you should mix these parts up you will have to find the exact piece to fit the page as you go. If you feel you must trim anything it means you have the wrong piece. Great care has been taken to cut the pieces of the book to fit.
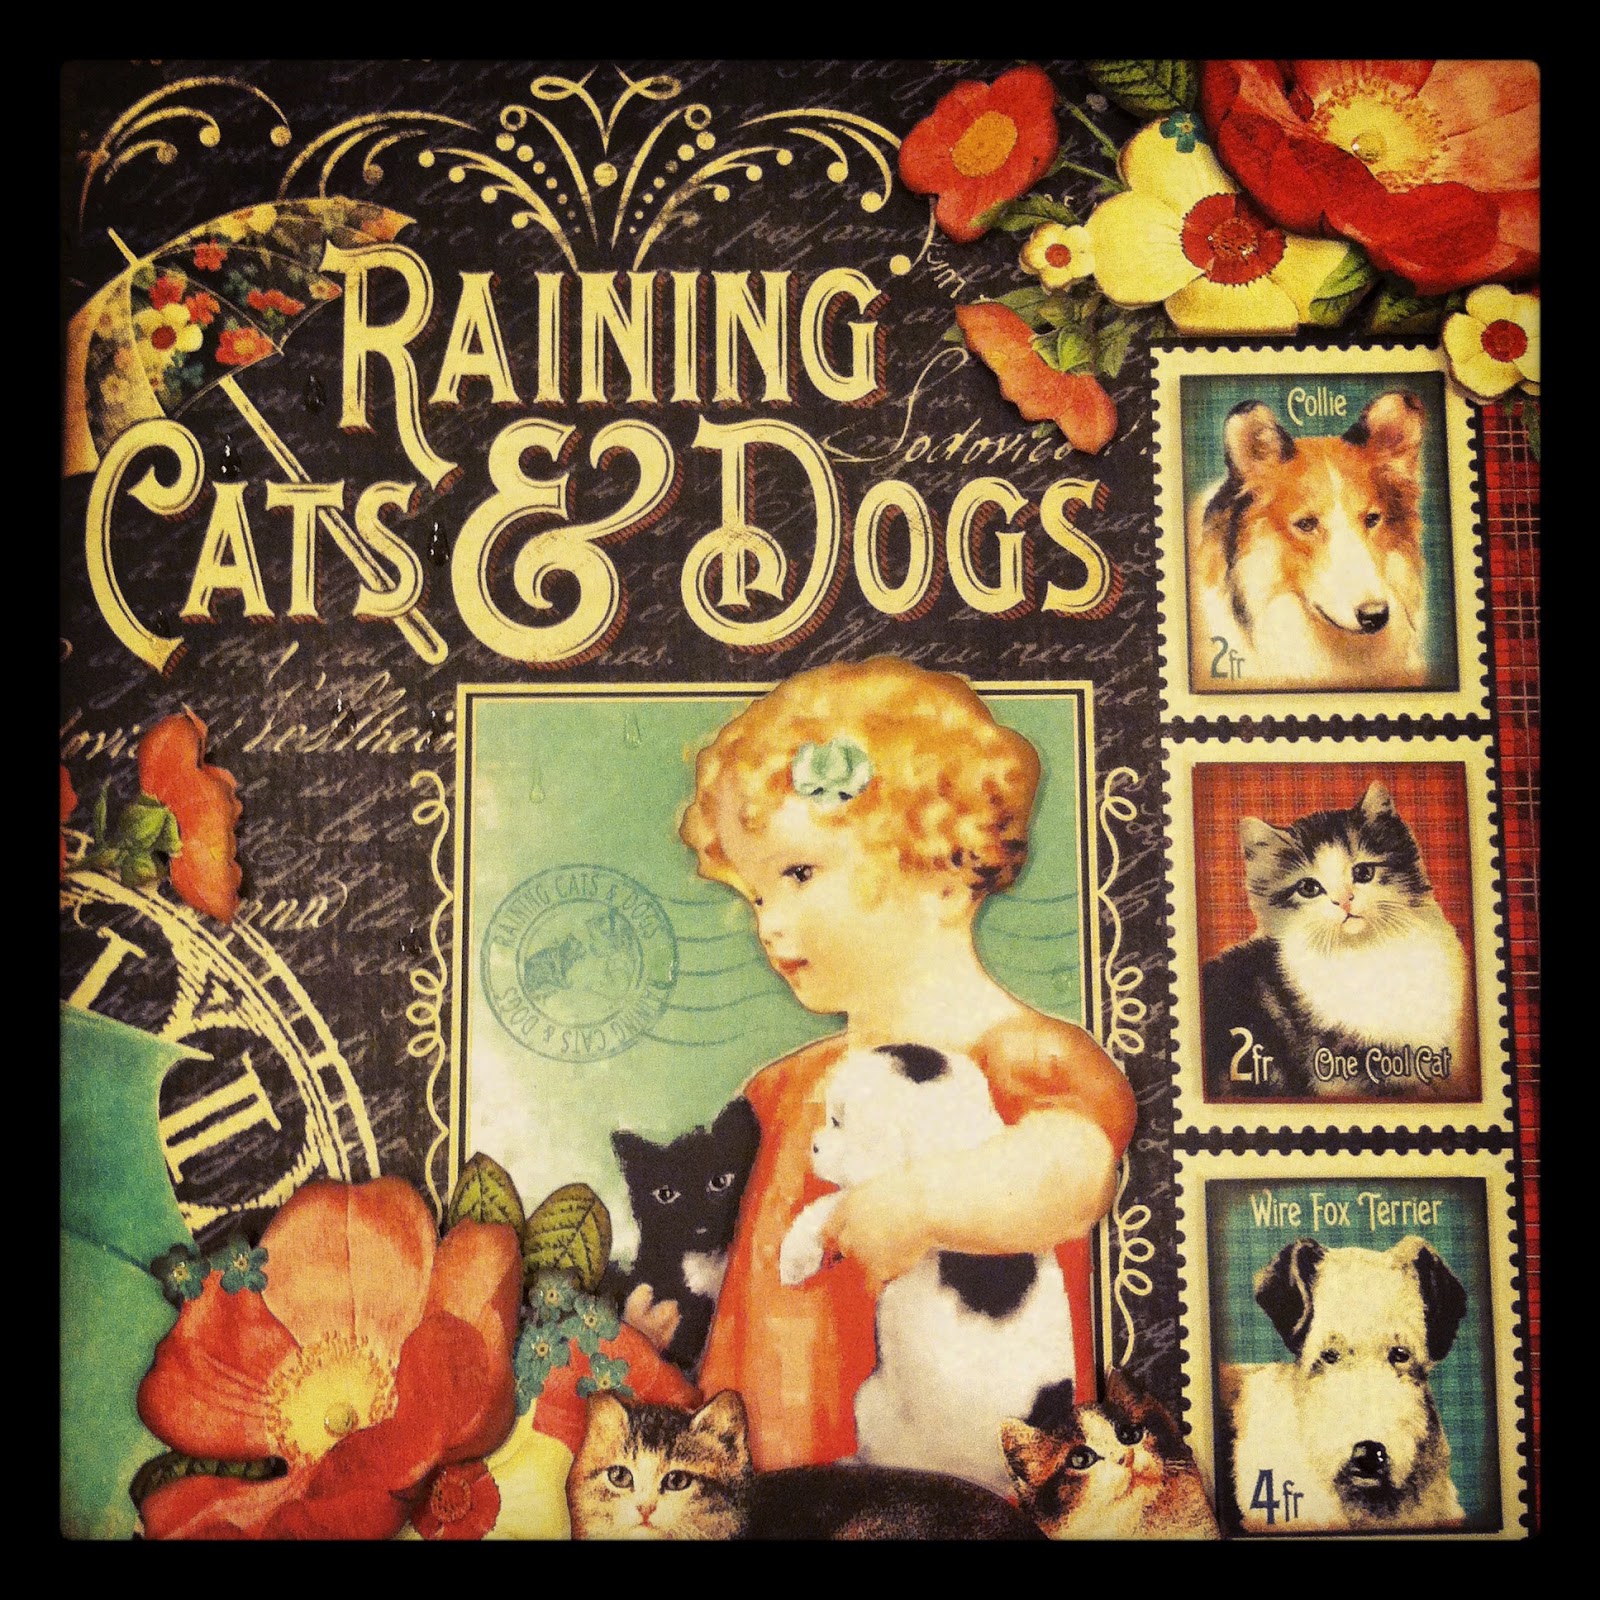
Cover:

The front cover of this book is multidimensional. You have an 8x8 piece that is pre-cut for you. You also have a full sheet of this same paper.
1. Adhere the pre-cut sheet to the chip board.
2. From the full sheet, cut out the girl, the stamps and the flowers. Using foam tape lift each piece up to create the dimensional look for the front. Be sure to ink the edges of each piece. The book is in the shop if you would like to see it up close.
Inside Front Cover:
The inside front cover is three pieces put together. There is a card (lucky dog), a small (4X2 inch) red floral and a larger (4X8 inch) floral piece. These three pieces make up the background of the inside front cover. There is also a blue plaid photo mat (3 1/2 X 5 inch) that will go on the floral. On your sticker sheet you will find the sticker shown and pop it up along the bottom.
Page 1:
(shown above)
Background paper is dark floral print (8X12). Find the two blue mats (3 1/2 x 5 and 2 1/2X3 1/2) Place them on the background as shown. Find the sticker strip and place it at the bottom of the page.
Make the embellishment at the top by layering a Tim Holtz ticket, a red plaid tag and two stamp stickers. I popped up the stamp stickers. Add a little ribbon to the small tag.
Page 2:
Fold the dark floral to the back to form a pocket. Fold down the top of this pocket as shown and glue the gingham piece over this flap. Glue the pocket along the bottom and up the side to create the pocket. There is a striped tag that goes in this pocket. Adhere the gingham mat and the polka dot mat as shown and pop up the stickers as shown.
Cut out the little Dog card as an insert piece.
Page 3:
This is such an easy page. Just look at the picture and follow what you see!
Page 4:
Again this page is not hard...I have precut the pieces for you. The only thing you will have to do that is out of the box is to make the little diagonal pocket on the corner...find the pieces for the pocket and glue it along the two edges. There is also a little tag that goes in the pocket.
Cut out the postcard to be used as an insert piece.
Page 5:
This is the umbrella paper (8"x12") This piece should be scored and cut for you but if it is not (oops) score it 4" from right edge and cut that narrow edge in half as shown.
Cut out the Cat Card from your sheet and glue it in place, Tie a little ribbon in the top of the tag and glue it in place. Glue the floral squares to the two flaps and fold toward the front.
On the back of these flaps glue the plaid squares and tie a little ribbon around them.
Page 6:
The left hand page is so easy! Make the post card into a pocket for extra pictures and memorabilia. This is the perfect place to put immunization records.
Page 7:
Probably the toughest page. You are building a gatefold page. I have already cut and scored the black cardstock for this page. Find the 8 x 12 inch black card stock. You will also need the 8x4 inch piece. I have scored this piece 1/2" from the left edge. In that 1/2" space glue the small piece to the large piece along the left edge. Fold the other side to the front. This forms your gate fold.
You have two plaid piece that will make the pockets on the bottom of each fold. There is also a tag cut for each pocket. Decorate the pocket with the pieces shown. You will trim the top and bottom flourish from the "all you need is LOVE and a DOG" piece. You will use those flourishes in the inside Glue the small striped photomats to the front of these flaps.
Inside:
On the inside you will decorate as shown. The large girl with the dog is from the first piece we cut out elements for the cover of our book. Cut her out with some flowers and add her first I covered a piece of chipboard with black and white polka dots for the element in the upper left hand corner.
Page 8:
Find the pieces for this page. Three pieces make up the background. I put the plaid and the umbrellas in place then put the border over the seam. The card is backed with black card stock and the mat has sticker corners on it.
Page 9:
This isn't hard but it is hard to know what to do from the picture.
1. build on the red background.
2. find the striped pocket piece and glue to the bottom along three sides
3. find the floral pocket piece and glue over the striped pocket along three sides...this will create your double pocket.
4 find the red square for the side pocket and fold down the left hand corner Add the floral to the stripe corner. Add tags, mats and chipboard elements.
Page 10:
This page is done just like you did Page 8. Build the background first and then add the photo mats and the chipboard embellishments or stickers and the card in the upper left corner.
Page 11:
Another slightly challenging page...
1. This is created on the black cardstock page I have cut and scored for you.
2. Fold up the pocket at the bottom. Cut down two inches in the center of the pocket and fold the flaps back. Cut the little red square in half diagonally and glue to the corners you folded back
3. Take the two blue plaid pieces and fit them to the front of the pocket. Glue in place.
4. Glue the background in place.
5. Glue the pocket in place along the right hand side.
Add photo mat, tags and the chipboard element at the bottom of the page.
Fold the other flap to the back.
Page 12:
This flap will fold up. Get all your papers in place AFTER you punch two holes on the bottom of the flap and in the center of the flap for your buttons. After you have the holes punched put your papers in place on the front and punch the holes again to attach your buttons. I used black seam binding for this. Tie a piece of black and white bakers twine to the top button to be used as a string tie to hold the flap up. After you have done this you will decorate the inside of the lower flap with red plaid.
Open the flap and decorate the inside as shown in the picture.
Inside back cover:
Just remember the dark floral is a pocket and there are two tags to go in the pocket.
back cover is just the dark floral...tie your ribbons and extra chipboard tags to the spine.